Gordon Ramsay Chicken Okonomiyaki Recipe transformed my cooking game completely. I remember my first attempt—excitement with a side of dread was palpable as I mixed the batter, convinced I could nail that umami-rich flip. But what emerged was a soggy disaster, falling apart in the pan, the potential flavor lost in a sea of disappointment. It wasn’t until I learned the critical techniques—perfect heat control, timing the basting just right, and allowing that beautiful crust to form—that everything clicked. The sizzle of the okonomiyaki cooking in the pan became music to my ears, each flip releasing tantalizing aromatics that wafted through my kitchen like a promise. Cooking this way changed how I approached every dish, and I’m here to share the secrets of the Gordon Ramsay Chicken Okonomiyaki recipe with you. Get ready to elevate your home cooking, because this isn’t just about food; it’s about mastering a technique.
The Fatal Flaws in the Gordon Ramsay Chicken Okonomiyaki Recipe
When pursuing perfection in the Gordon Ramsay Chicken Okonomiyaki recipe, many cooks stumble in the same ways.
Misjudging heat: Not controlling the heat leads to uneven cooking. If your pan isn’t hot enough, the okonomiyaki will steam rather than sear, losing that crucial texture.
Skipping resting time: Resting the batter before cooking allows the flour to hydrate, creating a better texture. Most overlook this step, resulting in a dense pancake instead of a light, airy version.
Disregarding pan choice: The right non-stick pan is critical. A cheap or scratched pan can ruin the cooking establishment, causing sticking and tearing. A superb-quality pan makes a world of difference.
Neglecting seasoning: Failing to season properly before cooking can lead to bland outcomes. Proper timing with salt and other spices enhances the flavors significantly as they develop during cooking.
Rushing the basting process: Basting with butter at the right moment enhances flavor. If you drown your okonomiyaki in it too early, you’ll lose that rich, nutty finish that brings the dish alive.
What You Must Remember from Gordon Ramsay
Gordon Ramsay emphasizes that “color equals flavor.” It’s not just about the final presentation; every step in cooking must add visual depth and aromatic complexity. His approach teaches that observing heat discipline is non-negotiable—maintaining the right temperature is crucial for achieving that perfect crust. Ramsay’s basting technique isn’t just there for flavor; it creates layers, each additional touch of butter adding richness without overshadowing the dish itself. Stay focused, keep distractions away from the pan, and you’ll channel Ramsay’s relentless pursuit of flavor into your own kitchen.
My Personal Technique Adjustments for Home Cooking
Crafting the Gordon Ramsay Chicken Okonomiyaki recipe at home is a personal journey. I hold onto the essentials: precise heat control, ensuring that I can achieve that golden, crispy exterior that is the hallmark of a good okonomiyaki. However, I tweak the pan choice; a heavy cast-iron skillet, while classic, can be overkill for this dish in a home setting, so I often use a flatter non-stick pan that warms evenly.
I also like to finish with a nice touch of herb-infused butter instead of the standard method, adding another layer of flavor. The touch test has replaced my reliance on a thermometer; I trust my instincts. When I turn the okonomiyaki, if it resists, I know it’s not yet ready. Sometimes, I bend the rules—like adding a touch of chili for heat—because that experimentation fuels my creativity in the kitchen.
Ingredients with My Notes
Main ingredients:
- 1 cup all-purpose flour
- 1 cup dashi stock or chicken broth
- 2 large eggs
- 1 cup shredded cabbage
- 1 cup cooked chicken, diced
- 1 green onion, sliced
Optional finishing additions:
- Okonomiyaki sauce
- Kewpie mayonnaise
- Bonito flakes
- Pickled ginger
- Seaweed flakes
The Straightforward Cooking Method
Start by combining the all-purpose flour and dashi stock in a mixing bowl to create a smooth batter. Follow that with adding the eggs, whisking until fully incorporated. This is where resting the batter comes into play; let it sit for about 10-15 minutes while you prepare the other ingredients.
Heat your non-stick skillet over medium-high heat, allowing it to get hot before adding a splash of oil. Once shimmering, pour in a ladle of batter, then top it with the shredded cabbage and chicken pieces, spreading evenly. The secret is to maintain a consistent heat; if it’s too hot, you’ll burn the outside before the inside is done.
After a few minutes, when the edges begin to lift and show signs of browning, gently flip the okonomiyaki using a large spatula. Now’s the time to add a generous pat of butter on top, letting it melt and baste as it cooks for another few minutes. This technique not only enriches the flavor but keeps the cake moist.
Once flipped and golden, check the texture by gently pressing down in the center; it should feel firm. Use a probe thermometer if unsure, aiming for an internal temperature of around 160°F. After about 4-5 minutes on this side, remove from the pan and let rest briefly; this helps to set everything perfectly.
As a finishing touch, if you like, you can add a dab of okonomiyaki sauce and a drizzle of Kewpie mayonnaise for that restaurant-style touch. Slice the finished okonomiyaki into wedges, and serve immediately, garnished with bonito flakes and seaweed if desired. Enjoy the rich, complex flavors that come from perfectly executed technique.
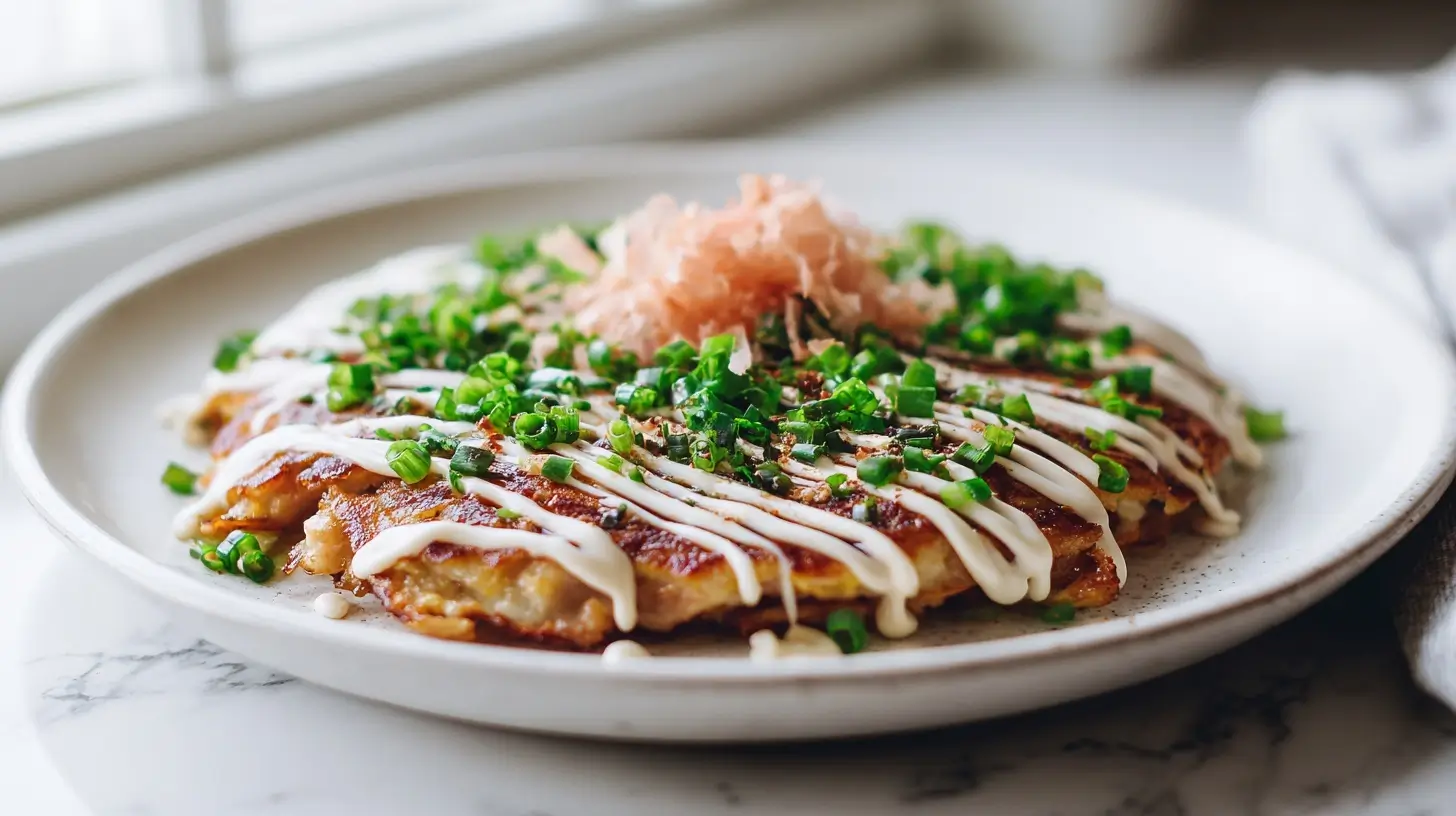
Gordon Ramsay chicken okonomiyaki recipe
Rate this RecipeIngredients
Equipment
Method
- In a mixing bowl, combine shredded cabbage, flour, eggs, water, salt, and pepper. Mix until well incorporated.
- Heat a skillet or griddle over medium heat, and add a little oil.
- Pour in a portion of the batter, making a round pancake shape.
- Add the chicken pieces on top and cook for about 5-7 minutes until the bottom is golden brown.
- Carefully flip and cook the other side for another 5-7 minutes until cooked through.
- Remove from the skillet and repeat with the remaining batter and chicken.
- Drizzle with okonomiyaki sauce and mayonnaise, and garnish with green onions.
Nutrition
Notes
Tried this recipe?
Let us know how it was!Explore More Chicken Creations
For those looking to expand their culinary skills beyond okonomiyaki, consider trying the Gordon Ramsay Chicken Soup, a comforting dish that showcases the versatility of chicken in warm, hearty meals.
Additionally, the Gordon Ramsay Chicken And Rice offers a flavorful balance of tender chicken and aromatic rice, making it a perfect next step in your cooking repertoire.
Lastly, don’t miss out on the rich flavors found in the Gordon Ramsay Chicken Risotto Recipe, which exemplifies the creamy texture that can elevate your home dining experience.
Common Mistakes and Corrections to Avoid
High pan heat during cooking
Using too high a heat can scorch the outside while leaving the inside undercooked. Maintain medium heat and adjust as necessary for even cooking.
Excess moisture in the batter
Adding too much liquid or vegetables can lead to a soggy okonomiyaki. Ensure your ingredients are well-drained and incorporate only enough liquid to achieve a thick batter.
Flipping too soon or too often
Flipping your okonomiyaki prematurely prevents a golden crust from forming. Allow it to cook undisturbed for 4–5 minutes before flipping, and avoid unnecessary handling afterward.
Insufficient resting time
Not allowing the batter to rest can lead to a dense texture. Let the mixture rest for at least 10 minutes for optimal air incorporation and a lighter final product.
Essential Techniques for Maximum Flavor
Choose the right pan
Utilize a non-stick skillet or a well-seasoned cast iron pan to prevent sticking and achieve a perfect sear. This ensures that each side crispifies beautifully without losing moisture.
Implement butter basting throughout
Melt a tablespoon of butter over the cooking okonomiyaki, spooning it repeatedly to enhance flavor and develop a rich, golden crust. This technique amplifies the umami profile while keeping the pancake moist.
Start with room temperature ingredients
Bringing your ingredients, especially chicken, to room temperature ensures uniform cooking and develops a consistent sear. This step eliminates drastic temperature changes that could lead to uneven doneness.
Rest the pancake after cooking
Allow the okonomiyaki to rest for at least 5 minutes after cooking to set the structure. This step helps retain moisture and improves flavor melding.
Slice against the grain for serving
When ready to serve, slice your okonomiyaki against the grain to achieve tender bites. This method ensures each piece is easy to chew, enhancing the overall dining experience.
Tried-and-True Flavor Additions
Spicy mayo drizzle
This addition brings a creamy heat to your dish. Drizzle it over the cooked okonomiyaki just before serving for a smooth finishing touch.
Pickled ginger layers
Incorporate finely chopped pickled ginger into the batter for a subtle zing. Mix it in during the final stir before cooking, so the flavors meld beautifully.
Sesame seed topping
Sprinkle toasted sesame seeds on top for a nutty depth. Use this finishing touch right before serving to maintain crunch.
Green onion inclusion
Add finely chopped green onions into the batter for a fresh bite. This addition provides a savory contrast and should be mixed in before cooking.
Effective Storage and Reheating Techniques
For refrigerator storage, place your cooled chicken okonomiyaki in an airtight container. It can be safely stored for 2–3 days, allowing the flavors to continue to meld as it sits.
When reheating, use a skillet over low heat to revive its crispness. Cover it with a lid to retain moisture while ensuring the exterior crispifies.
For leftover uses, consider transforming your okonomiyaki into a filling for wraps or sandwiches. Alternatively, chop it into pieces and incorporate it into a stir-fry for a quick and tasty meal.
Clarifications on Common Questions
How do I achieve a crispy crust on my okonomiyaki?
To achieve a crispy crust, ensure your pan is adequately preheated and use a non-stick coating. The right temperature and ample oil will facilitate perfect browning.
How long should I let my okonomiyaki rest before cutting?
Resting your okonomiyaki for 5 minutes after cooking helps the structure settle and flavors meld. This timing results in a superior texture and taste.
What’s the best chicken cut for okonomiyaki?
Choose boneless, skinless chicken thighs for their rich flavor and juiciness. Thighs maintain moisture better during cooking, preventing dryness.
How much oil should I use for frying?
Use 1–2 tablespoons of oil per batch in your pan, adjusting as necessary to prevent sticking. Too little oil can lead to uneven cooking and sticking.
Can I make okonomiyaki with other proteins?
Absolutely, you can substitute chicken with pork, shrimp, or even tofu. Adjust cooking times by monitoring doneness for each protein choice.
Mastering the Technique with Precision
Confidence in cooking comes from knowing you can replicate restaurant-quality results at home. By adhering to these methods, you’ll elevate your home cooking and impress anyone who tries your okonomiyaki. Embrace these techniques with purpose, and deliver flavors that resonate at a professional level. Now, commit to cooking with intent and make your next okonomiyaki unforgettable.