Gordon Ramsay Chicken Unagi Recipe has become my go-to for a spectacular dinner, a game changer that has transformed the way I approach this popular dish. I still remember my first attempt, staring at a raw piece of chicken, skeptical and unsure. I followed the methods but miscalculated the heat, letting my chicken sit too long on the pan, resulting in a dry interior and a rubbery crust—an absolute disaster. And then it clicked: I needed to command the heat, control the timing, and embrace the power of flavor development. The moment I harnessed those principles—listening to the sizzle, watching the color deepen—I knew I had the keys to a world-class chicken experience. Today, I’m here to break down the Gordon Ramsay Chicken Unagi Recipe step by step, and if you stay sharp in the kitchen, you’ll achieve stunning results that will elevate your cooking.
Stop Making These Mistakes with Gordon Ramsay Chicken Unagi Recipe
Heat Control Is Crucial
Too hot, and you’ll burn the outside while the inside remains undercooked. Too low, and you’ll miss that vital Maillard reaction—the golden crust that develops flavor. Learn to manage your heat by adjusting flames on the fly.
Timing Is Everything
Many home cooks underestimate timing, leading to overcooked chicken or soggy skin. Use your instincts alongside a timer, and remember that chicken should rest to redistribute juices once it’s off the heat.
Seasoning Like a Pro
People often skimp on seasoning during cooking, thinking they can salvage it later. Season aggressively at every stage—before cooking, during, and lightly after— to build a layered flavor profile.
Choice of Pan Matters
Your pan can make or break this dish. Stick to a heavy skillet that retains and distributes heat evenly. Non-stick pans might tempt you, but they can inhibit browning and the development of flavor.
Know When to Baste
Basting throughout the cooking process enriches the flavor and moisture of the chicken. However, don’t get distracted; stay focused. Frequent lifting of the chicken disrupts the cooking rhythm and can lead to an uneven cook.
Key Philosophies from Gordon Ramsay
Gordon Ramsay emphasizes a foundational principle: “color equals flavor.” When executing the Gordon Ramsay Chicken Unagi Recipe, discipline in heat is non-negotiable. That color you achieve through expert browning is what will make your dish shine. Adding that final touch of butter near the end of the cooking process allows it to melt and infuse the chicken with decadence. You can’t afford distractions when you’re cooking; every detail matters. The basting in combination with a disciplined heat strategy creates a harmony of flavors that speaks for itself.
My Home Adaptations of Ramsay’s Technique
When I cook the Gordon Ramsay Chicken Unagi Recipe at home, I preserve the essence of Ramsay’s technique, particularly his approach to heat management and flavor layering. However, I tweak a few things for my setup. I favor a cast-iron skillet for its ability to retain heat and develop a crust that is simply unparalleled. That said, depending on the mood, I might go for an enameled skillet for a slightly softer result.
I pay attention to the touch test instead of relying solely on a thermometer. Once I’ve learned my chicken, I can tell when it’s perfectly done by how it feels when pressed—tender but not soft. It’s that visceral connection with the ingredients that elevates my cooking. And yes, there are times I break the conventional rules; a good splash of whiskey for flambéing adds depth and complexity, something Ramsay might not approve of in a strict interpretation, but it sure makes it memorable.
Ingredients with My Notes
Main ingredients:
- 4 chicken thighs, skin-on
- 1 cup unagi sauce
- 2 tablespoons soy sauce
- 1 tablespoon sake
- 2 tablespoons mirin
- 1 tablespoon cooking oil
- Salt and pepper to taste
Optional finishing additions:
- Chopped green onions
- Sesame seeds
- Fresh cilantro
Cooking Method for Gordon Ramsay Chicken Unagi Recipe
Start by preheating your skillet over medium-high heat. The goal here is to achieve a hot enough pan that will give you a beautiful sear on the chicken. Pat the chicken dry using paper towels, which is crucial for that crispy skin.
Season the chicken thighs liberally with salt and pepper on both sides. Don’t skimp here; the seasoning will bring out the chicken’s natural flavors and complement the unagi sauce as it cooks.
Add the oil to the hot pan and swirl it around. Once the oil is shimmering but not smoking, place the chicken skin-side down. Resist the urge to move it around; you want that skin to lay flat against the pan for proper browning.
Cook the chicken for around 6–8 minutes. Keep an eye on it—you’re looking for a deep golden-brown color. This is where that all-important crust develops. If you notice the pan starting to smoke, reduce the heat slightly to avoid burning.
When it’s beautifully browned, flip the chicken over with tongs. At this point, lower the heat to medium and let it cook for another 6–8 minutes, ensuring it cooks evenly. Here’s where you can begin basting. Tilt the pan slightly and spoon the rendered fat over the thighs repeatedly, helping to keep them moist and flavorful.
As the chicken nears doneness (around 165°F internally), mix the unagi sauce with the sake and mirin in a small bowl. Pour this mixture over the chicken in the last 2 minutes of cooking and allow it to caramelize slightly. Watch for bubbling; that’s the flavor intensifying.
Once the chicken reaches the target temperature, remove it from the heat and let it rest for at least 5 minutes. This step is vital as it allows the juices to settle, guaranteeing a moist bite when cut.
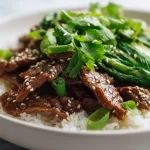
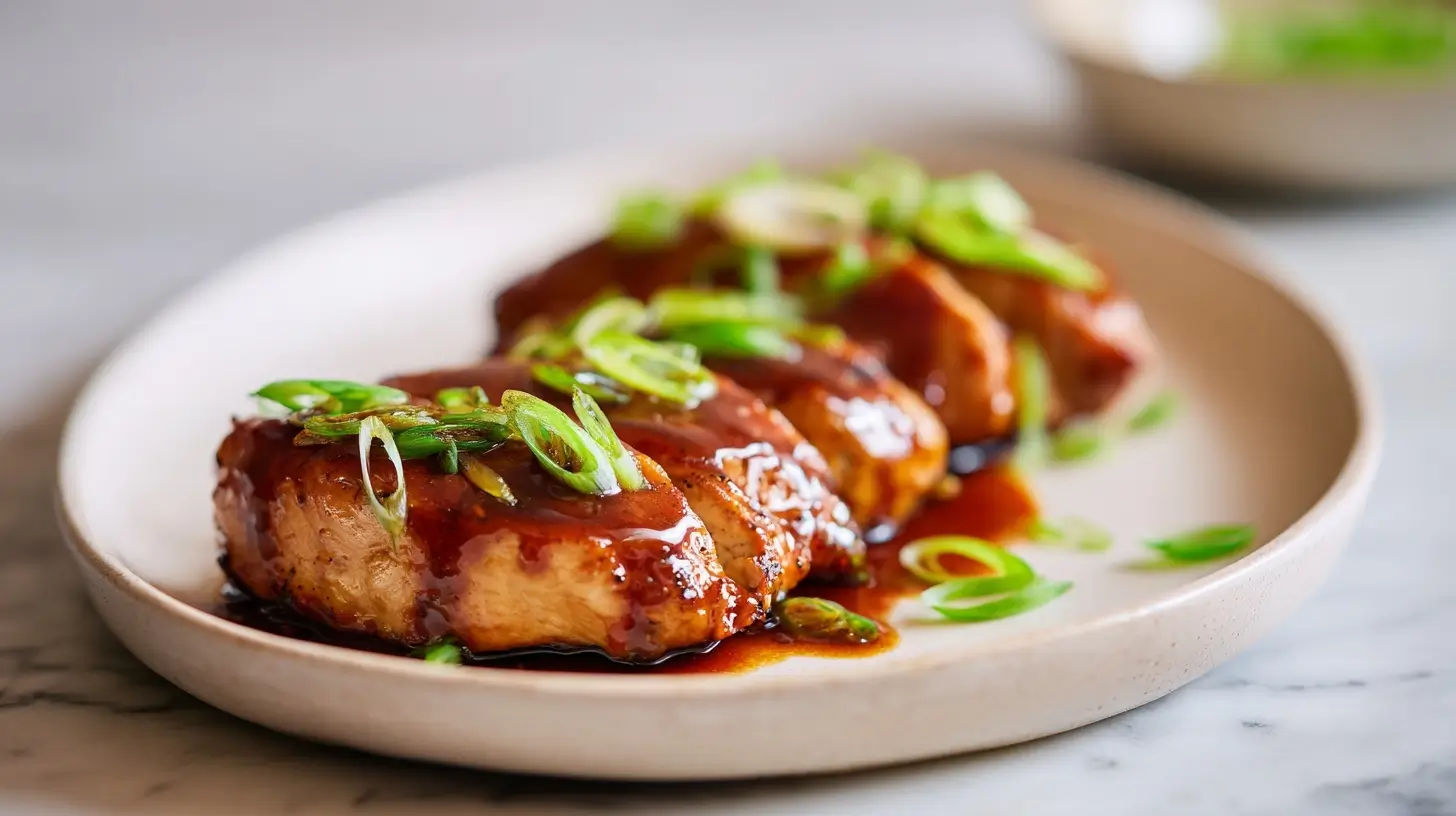
For an optional finishing touch, swirl in a tablespoon of butter to enrich the sauce before serving. Slice the chicken, drizzle with the residual sauce, and top with green onions and sesame seeds for an explosive finish. Enjoy the incredible depth of flavor from your execution of the Gordon Ramsay Chicken Unagi Recipe. You’ve earned it.
Gordon Ramsay Chicken Unagi Recipe
Rate this RecipeIngredients
Equipment
Method
- In a mixing bowl, combine the soy sauce, honey, mirin, minced garlic, and black pepper for the marinade.
- Add the chicken pieces into the marinade and let them sit for at least 10 minutes.
- Place the marinated chicken in the air fryer basket, spray lightly with oil, and cook for 15 minutes at 200°C.
- After 15 minutes, check for doneness and cook for an additional 5 minutes if necessary to achieve a crispy texture.
- Remove the chicken from the air fryer, drizzle with sesame oil, and serve immediately.
Nutrition
Notes
Tried this recipe?
Let us know how it was!Complementary Dishes: Expanding Your Chicken Culinary Horizons
For those looking to explore more chicken recipes, consider trying Gordon Ramsay’s Chicken Soup, which offers a comforting twist while maintaining robust flavors.
Another excellent option for a fulfilling meal is Gordon Ramsay’s Chicken and Rice, blending savory chicken with hearty grains for a satisfying dinner.
If you’re interested in a unique flavor profile, try Gordon Ramsay’s Chicken Tagine Recipe, which incorporates aromatic spices and ingredients to elevate your culinary repertoire.
Common Pitfalls and Their Fixes
Inadequate pan heat
Using a pan that’s not hot enough leads to chicken that stews rather than sears. Preheat the pan until it’s smoking slightly before adding the chicken to ensure a proper sear.
Excess surface moisture
If the chicken is wet when it hits the pan, it will steam instead of brown. Pat the chicken dry thoroughly with paper towels prior to cooking to achieve that desired crust.
Over-flipping the chicken
Constantly flipping the chicken prevents a proper crust from forming. Allow the chicken to cook undisturbed on one side until it releases easily from the pan before turning it over.
Insufficient resting time
Cutting into the chicken immediately after cooking causes juices to run out, resulting in dryness. Let the chicken rest for at least five minutes before slicing to retain maximum moisture and flavor.
Optimizing Your Cooking Technique
Choose the right pan for even cooking.
A heavy-duty stainless steel or cast iron pan retains heat better and delivers that golden crust. Ensure the pan is well-seasoned for an excellent non-stick surface that can handle high temperatures.
Implement a butter basting rhythm.
As the chicken cooks, tilt the pan and use a spoon to baste the meat with melted butter for maximum flavor infusion. This technique not only enhances the taste but also promotes an even cook while ensuring moisture retention.
Start with room temperature chicken.
Let the chicken rest at room temperature for about 30 minutes before cooking to encourage even cooking. Cold chicken will take longer to sear and could result in an uneven texture.
Master your resting logic.
Resting the chicken allows the juices to redistribute, resulting in a juicier final product. Cover it loosely with foil during resting to keep it warm without steaming.
Slice against the grain for tenderness.
When it’s time to cut, make sure to slice against the grain of the chicken to enhance tenderness. This simple adjustment greatly improves the eating experience, making the chicken easier to chew.
Flavor Profiles That Stand Out
Smoky paprika infusion
Adding smoked paprika to the chicken before cooking enhances the umami profile and adds depth. Apply it during the seasoning phase for a balanced flavor throughout.
Garlic and herb marinade
A mixture of minced garlic and fresh herbs like thyme or rosemary gives the chicken a savory kick. Marinate the chicken for at least 30 minutes before cooking for a concentrated flavor boost.
Zesty citrus glaze
Incorporating citrus juice and zest into your glaze brightens the dish with acidity. Brush the chicken with this glaze towards the end of cooking to develop a vibrant flavor without overpowering the main dish.
Teriyaki sauce finish
Finishing the chicken with a rich teriyaki sauce adds a sweet and savory element. Glaze the chicken during the last few minutes of cooking to caramelize the sauce and create a sticky, flavorful exterior.
Best Practices for Storage and Reuse
Effective Fridge Storage
Store leftover chicken in an airtight container in the fridge, ensuring it’s cooled to room temperature first. Properly sealed, it will last for up to three days without losing flavor or texture.
Efficient Reheating Method
Reheat chicken pieces in a preheated oven at 350°F (175°C) for around 10-15 minutes. Add a splash of chicken broth or a dab of butter to keep the meat moist and prevent drying out.
Practical Leftover Applications
Utilize leftover chicken for a hearty salad by slicing it thin and mixing it with greens and a citrus vinaigrette. Alternatively, shred the chicken to create a savory risotto, or incorporate it into a flavorful stir-fry for a quick meal solution.
Addressing Common Queries
Inquiring Minds: Cooking Oil Selection
What type of oil is best for cooking chicken?
Opt for oils with high smoke points like canola or grapeseed oil for searing chicken. These oils can withstand high heat without breaking down, ensuring a perfect crust.
How long should chicken rest after cooking?
Chicken should rest for 5-10 minutes before slicing. This resting time allows the juices to redistribute, ensuring every bite is moist and flavorful.
Which chicken cut is most suitable for the unagi recipe?
Bone-in, skin-on thighs provide the best flavor and moisture retention during cooking. If you’re looking for quick cooking, boneless thighs are also an excellent choice.
Is it necessary to seal the chicken before cooking?
Yes, patting the chicken dry is crucial to achieving a nice sear. Moisture on the surface will cause the meat to steam instead of brown properly.
Can I use leftover chicken in different dishes?
Absolutely, leftover chicken can enhance a variety of meals, from wraps to soups. Its versatility makes it an excellent component for creative recipes throughout the week.
Confidence in Technique and Execution
Achieving Culinary Excellence with Precision
Mastering Gordon Ramsay’s techniques for chicken unagi not only elevates your cooking game but also equips you with restaurant-level skills at home. By focusing on execution and attention to detail, you ensure each dish stands out. Don’t hesitate; dive into the experience with confidence, and transform simple ingredients into a remarkable meal. Stop second-guessing your capabilities, and cook with intent—your results will speak volumes.